It helps you position your hand and direct the bow towards the target properly
Nearly every archer spends a large amount of money on buying a good bow. It’s important to allow your bow to then perform at it’s full potential by getting a grip that suits your hand. Yes, this takes time, experimentation and lots of patience. However, a great bow with a terrible grip will perform much worse than even a mediocre bow with a great grip that is suited to you.
Think of it this way, there are only two places where you touch the bow through your whole shot: the grip and the hook. Having a poor grip or poor bow hand technique can have a HUGE impact on your performance. If you have a grip which isn’t suited to you, it can make it very hard to get the correct bow hand position and direction through the shot.
Before diving into this guide, it’s important to clearly understand how to set your grip in the bow. Furthermore, you should understand how this should feel throughout the shot and how to direct the bow properly. Take a look at how the bow hand looks from different angles in the video below. You can read about this in detail in our dedicated technique section, Set (Hand Position).
The Fastest Way to Learn Archery
Save years of frustration and improve your technique and scores today. Without spending thousands on equipment or travelling hours for coaching. Plus OAA readers get 20% off.
Expert step-by-step guidance, lifetime access and a 100 day money-back guarantee, no questions asked.
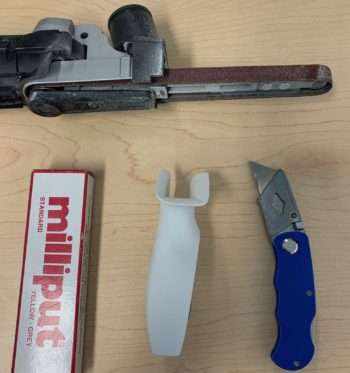
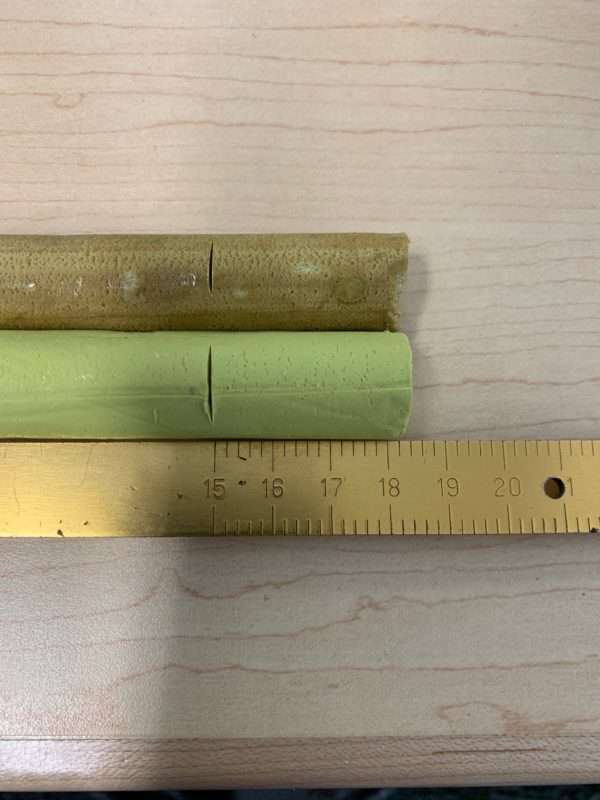
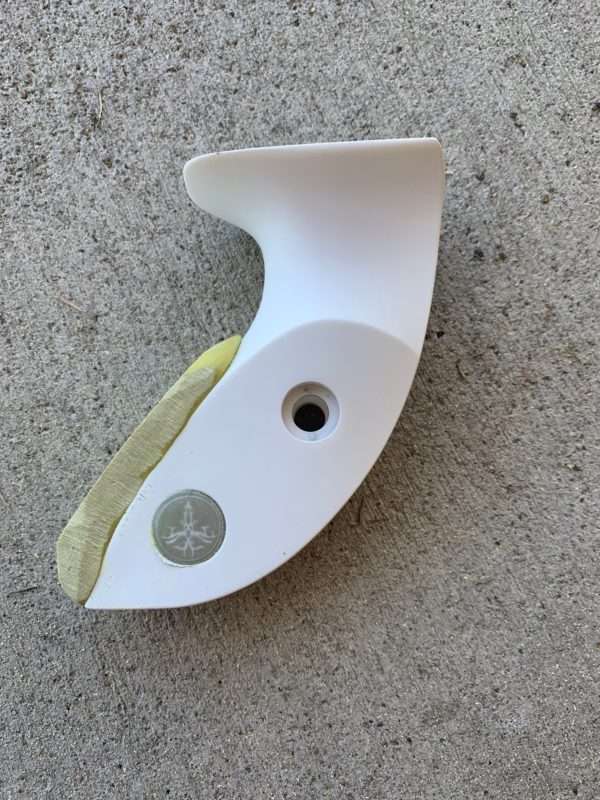
There are many different types of putty you can use, and most of them work well. My favourite is the Yellow-Grey Standard Milliput which is shown in the picture. If you want something a little bit harder you can use J-B WaterWeld Epoxy Putty. It does take a little longer to file down because it’s harder, so bear that in mind.
A belt sander like the one in the picture is ideal to file your grip down as it makes it much quicker than just using sand paper. Don’t worry if you don’t have one though, it’s perfectly possible to just use some sandpaper. You’ll just have to be more patient. If you don’t have an electric sander then it’s worth spending some extra time to get the original shape of your grip as close to what you want as possible. This will cut the amount of sanding timing down dramatically, especially if you’re using a harder material like the J-B WaterWeld.
Fig. 1 – What you’ll need
How To Make A Custom Bow Grip: Pt 2
Prepare and shape the grip
Fig. 2
Fig. 3
Fig. 4
Fig. 5
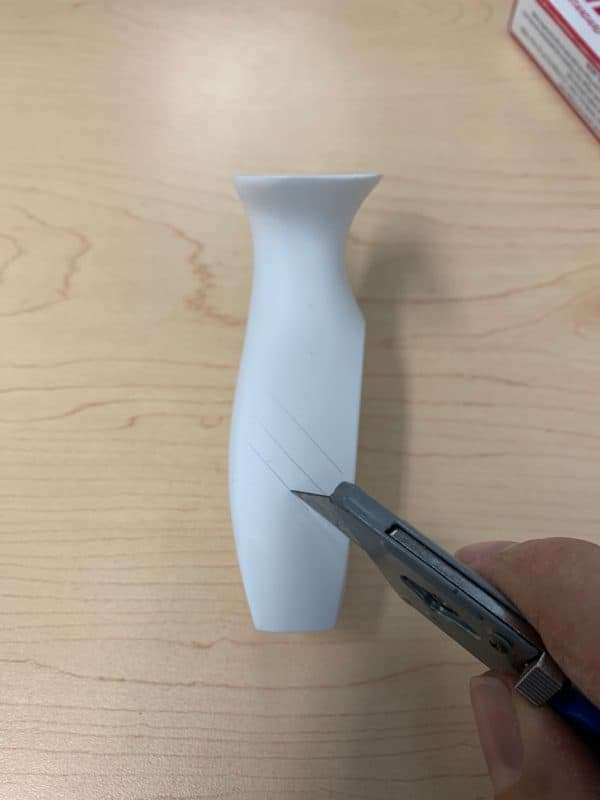
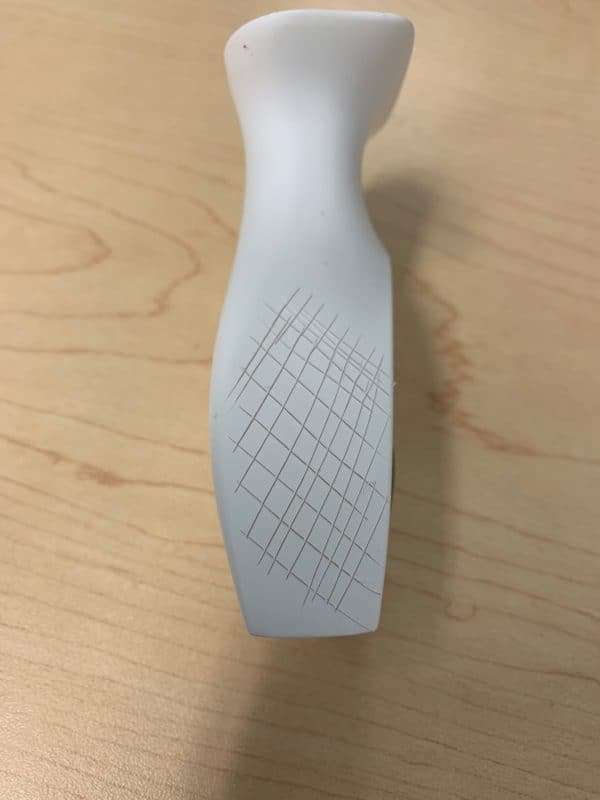
Stage 1. Prepare the grip
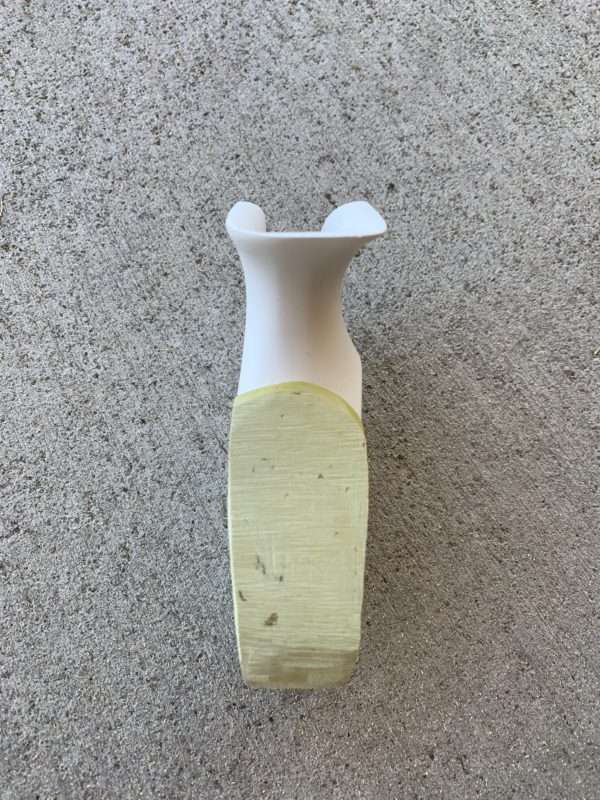
The first thing you need to do is prepare the surface of the grip. This is always a good step to do to make sure the putty stays firmly stuck to the grip. Some manufacturers have a thin rubber layer on top of the plastic of the grip. This can make it hard for the putty to stick, and often the putty can fall off when you’re sanding it. Simply take a knife and score the grip to make a criss-cross pattern as you can see in Fig 1/2. The putty will go into these score marks when you shape it on the grip, and this will make sure the putty sticks properly. It might look like you’re destroying your grip, but it really does make a difference! It will all be covered up by the time you’re finished anyway, so there’s no need to worry about your bow looking a mess.
Stage 2. Mix the putty
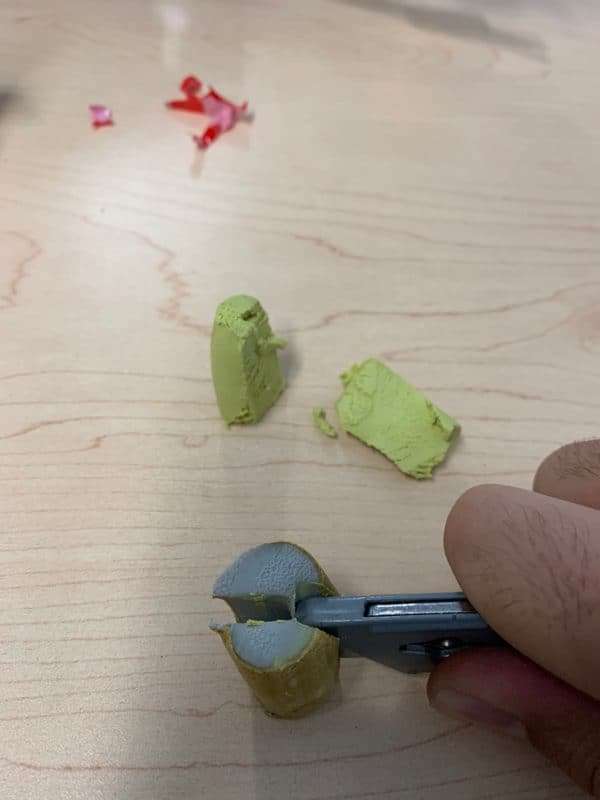
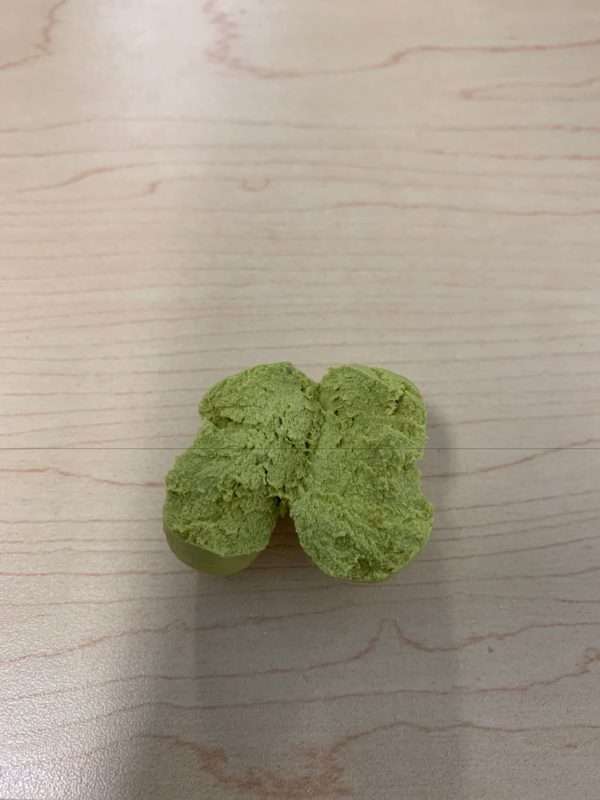
Secondly, you need to prepare your putty. For the Milliput, take roughly 3cm of each part (see Fig. 3) and cut them from the main stick. Make sure to put away and seal the rest of the packet so it’s fresh for you to use in the future. You can make a good few grips from each packet of Milliput. Cut it down the middle (Fig 4) to make it a bit easier to mix. Then mix both parts together with your hands and spend a good 5-10mins blending it together. You know the putty is properly mixed when you can break it in half and the colour is completely uniform, with no spots (Fig 6).
Stage 3. Shape the grip
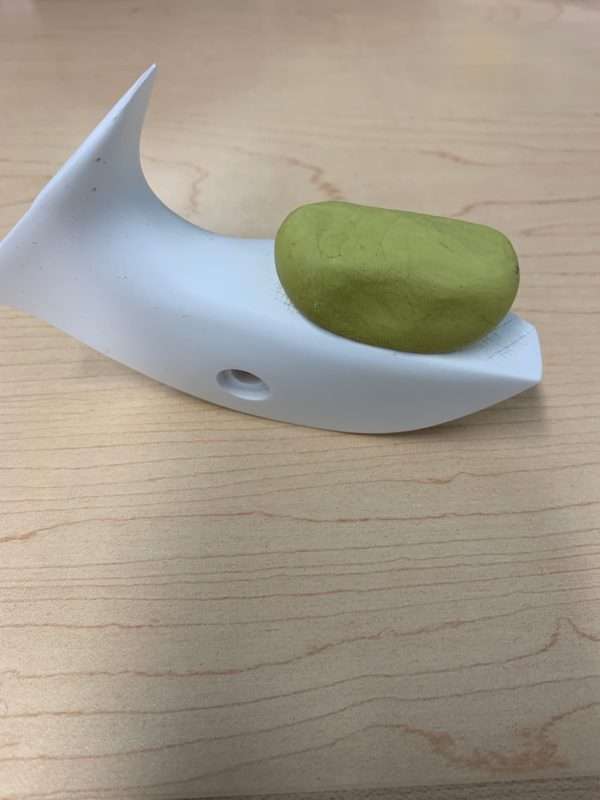
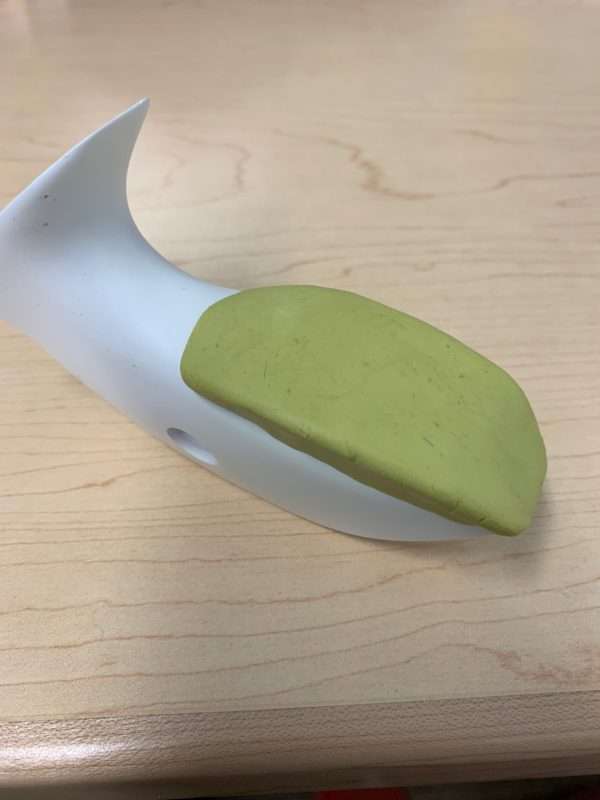
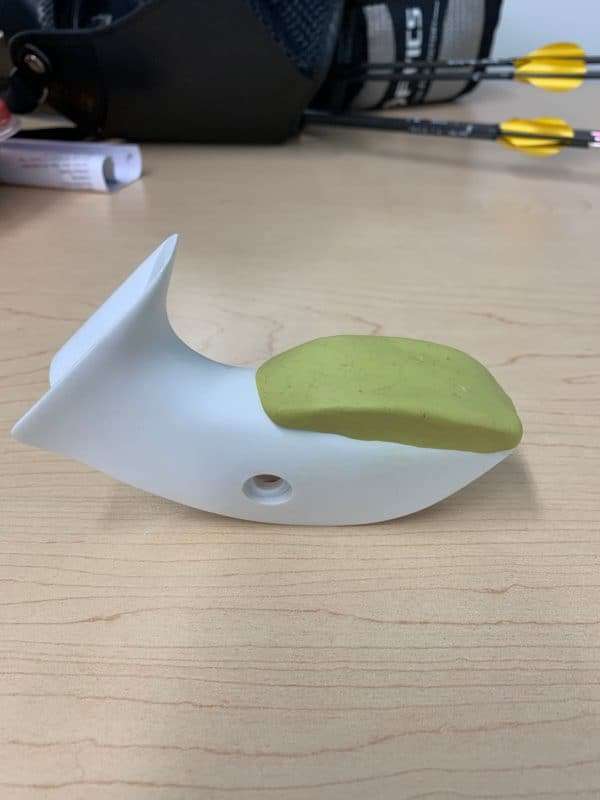
Once you’ve fully mixed the putty, bring it all together and form a nice smooth ball with it. Place this onto the grip and push it firmly in so the putty fills the score marks you made in the grip. Push the ball into a rectangular shape to more closely fit the shape of the grip as shown in Fig. 7. Then use your fingers to mould the putty onto the grip as shown in Figs. 8/9. Make the shape slightly wider and higher (a larger angle to the grip) than you’re aiming for. It’s easier to sand away than it is to take it all off and start again. The putty should slope away as it meets the throat of the recurve grip and normally it shouldn’t go all the way into throat. You can see this in the pictures.
Finally, let the grip harden before you sand it down. Normally it’s good to leave it overnight, but depending on the material you may be able to do it more quickly. Every epoxy putty has instructions that will tell you how long it takes to set.
Fig. 6
Fig. 7
Fig. 8
Fig. 9
How To Make A Custom Bow Grip: Pt 3
File and test the grip
This stage is the most time consuming and the most messy! Get your belt sander or sandpaper and file the grip away. This stage takes a while and it’s best to be patient. Always use a dust mask and clothes that you don’t mind getting dirty. Also, when you sand your grip, always take it off your bow. Otherwise, all the dust will cover your bow completely and you risk sanding a bit of your bow by accident.
Follow this process to get a rough grip to start with:
1. Sand away the main face of the grip (visible in Fig 13). Using a belt sander is great because you can sand evenly. Try to get the surface as smooth as possible, and get rid of any bumps that were left from when you shaped the grip.
2. As you’re doing this, work on the height profile of the grip (see Fig. 12). Look for an even gradient that smoothes off into the throat of the grip. Keep the angle fairly high for now, as you will need to test this to find what works for you.
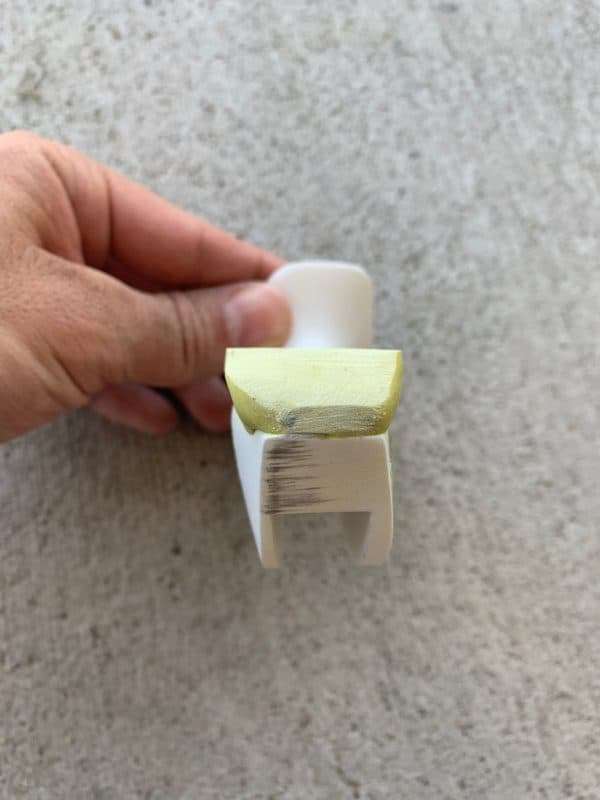
3. For the last part of this stage, slightly angle the grip left to right. For a right handed archer the grip should be slightly angled to the right (see Fig. 11).
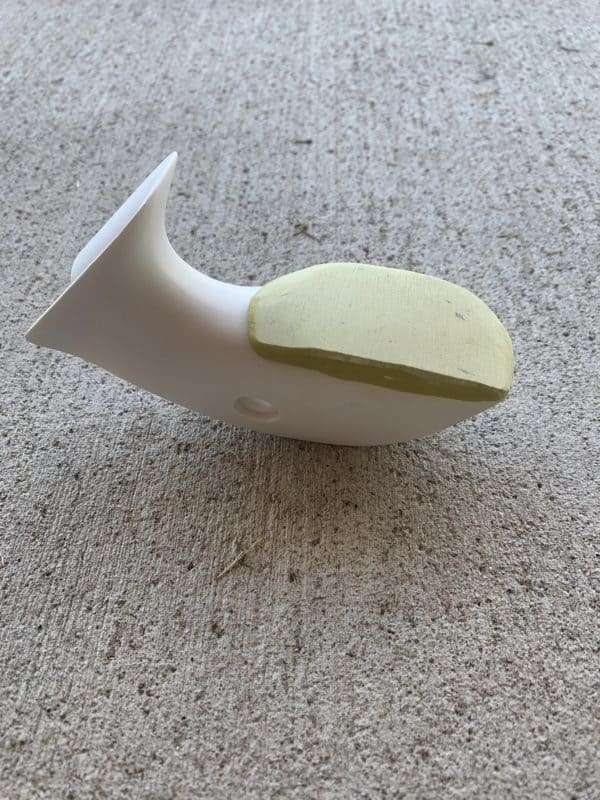
4. Now, file in the sides of the grip. The original shape in Fig. 9 was far too wide and protruded far over the side of the grip. File the sides in a bit as shown in Fig. 10.
This will give you a starting point. Now it’s time to test!
Fig. 10
Fig. 11
Fig. 12
Fig. 13
Testing the grip
This is the most important part of making your custom grip. It helps to have a coach take a look at you shooting when you use the grip, as they’ll be able to see if it helps you or not. However, you should also use your own feedback from how the grip feels. Once you test the grip, you should find out what you need to do, file it down some more and then test it again. So the real question is, how do you know if the grip is right for you? And how do you know what parts to file down?
There are some key metrics that are good to use when you’re testing the grip:
1. Does it allow you to position your hand properly and direct the bow through the thumb on release. See our Set (Hand Position) guide for more detail on this.
2. Does the grip help you rotate your bow arm elbow so that it’s vertical, and keep it there?
3. Does your bow fly out of your hand straight towards the target or does it jump one way. If this is hard for you to feel, you can watch or video the longrod on release.
4. How is your sight float? Is it more or less than the ‘standard’ grip?
5. Can you push the bow without torquing the grip when you do your expansion and direct the bow towards the target (see our Expansion – Recurve Archery Technique section).
6. What does your bow hand look like? Judge if you are able to position it properly by visually checking how it looks.
7. How is your grouping? Do you have any consistent errors that the grip could be causing? Has the grip helped to eliminate any errors that you used to have?
Become an OAA Subscriber and Learn from the World's Best Archers
Just $2.99/month. Get unlimited access to all OAA website content. Plus join my invite-only Telegram community with weekly training tips from Olympic Silver Medallist Steve Wijler and World Champs Medallist Bryony Pitman.
For beginners, we recommend you stick with the standard grip on your bow for a good while until you become more experienced. There will be much more important things to learn first of all.
Most commonly, if you are an intermediate archer you might not know what grip works for you. You might not know how to file the grip down in the first place so you get stuck with what to do. The key thing here is to try slightly different grip shapes within a reasonable range. Trying slightly different angles, widths and shapes of grips will vary your bow hand connection. Through this, not only will you learn what grip works well for you, you’ll also learn good bow hand technique more quickly. Changing grips is a good way to accelerate the learning of correct grip placement and bow hand direction through the shot.
As your technique improves over time, you will likely change grips. You’ll learn more about what a good shot should feel like and how the grip can help you achieve this. Unfortunately, it’s not a case of making one grip and sticking with it forever.
Finally, changing your grip can affect both your clicker position and bow tuning. So make sure you check these when you change your grip, especially before making any judgements about your grouping with a new grip!
I hope you enjoyed this article, thanks for reading! Please feel free to share this article with your archery friends if you found it useful!