🎉 Transform Your Archery in 2024 with a Limited-Time 20% Discount On All My Guided Courses. Click Here to Learn More.

Archery Stance and Posture

Table of Contents

INTRODUCTION

Your stance and posture is the foundation which everything else is built upon, and it’s especially important for recurve archery. It is crucial to the consistency of your whole shot. When we talk about ‘stance’ we are talking about the position of the feet.  We use the term ‘posture’ to refer to the shape, position and activation of the whole body. This starts from the feet and stretches right up to the head. The correct stance will let you shoot with correct posture and will help your recurve technique hugely.

Many people don’t give enough attention to their stance and posture. As a result, many recurve archers struggle to achieve correct shoulder positioning and technique. Attempting to correct this without improving posture first will be very difficult. Without good posture, it can also be hard to create and maintain balance, which is perhaps the most important part of any shot. As you can see, your stance and posture affects your ability to position and use your whole body.

A strong, stable stance and posture is essential. This will give you a solid base to work from and enables the most efficient shot. For recurve beginners, the key points from this technique section are below. You can also watch videos on stance and posture on our Online Archery Academy YouTube channel. If you’ve not yet read Recurve Archery Basics be sure to read that guide first.

Key Points for Recurve Archery Stance and Posture

1. Square stance, feet either side of the shooting line and parallel to it, shoulder width apart.

2. Weight slightly forward on balls of feet.

3. Legs rotated slightly and glutes engaged.

4. Pelvis tucked flat and core engaged.

5. Spine straight, T-posture, no postural sway.

6. Flat back, shoulders neutral, head neutral and turned fully.

ARCHERY STANCE

THE SQUARE STANCE FOR ARCHERY

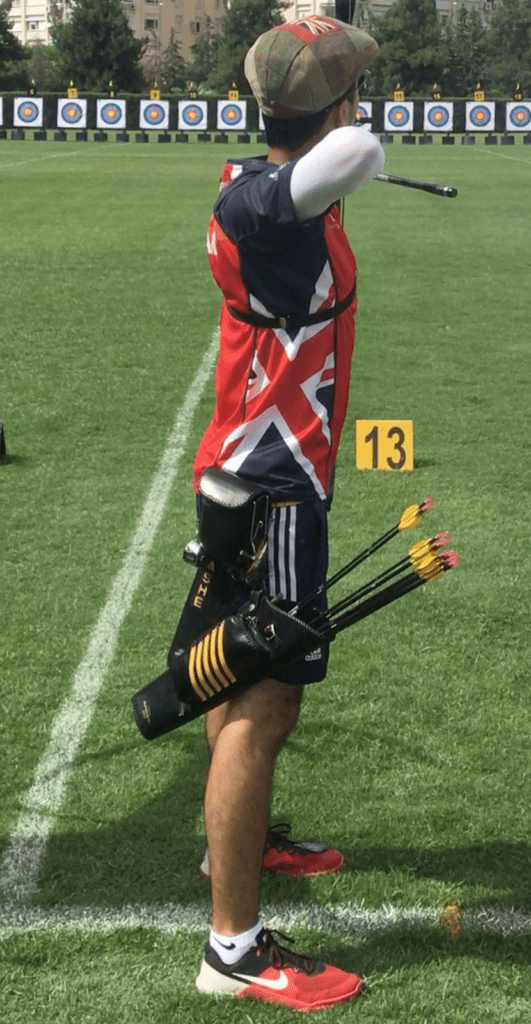
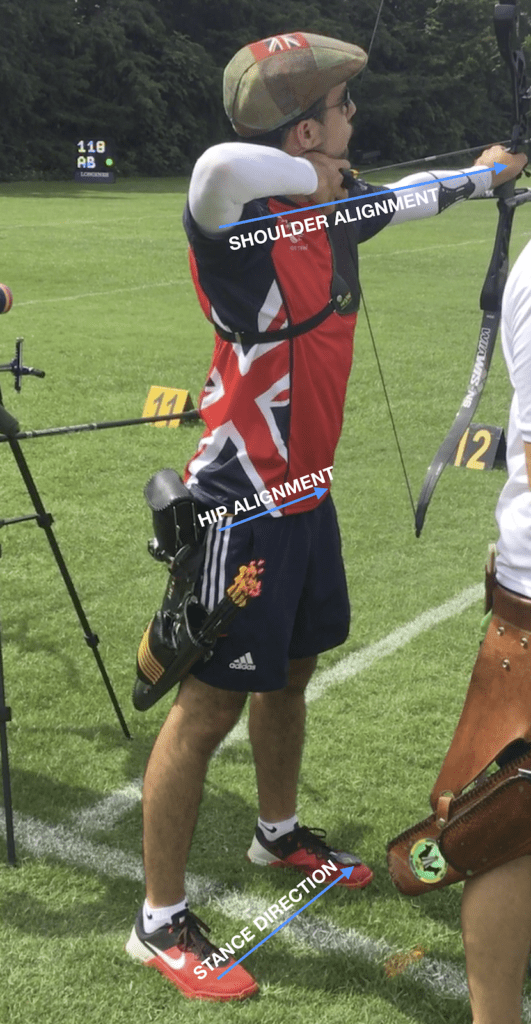
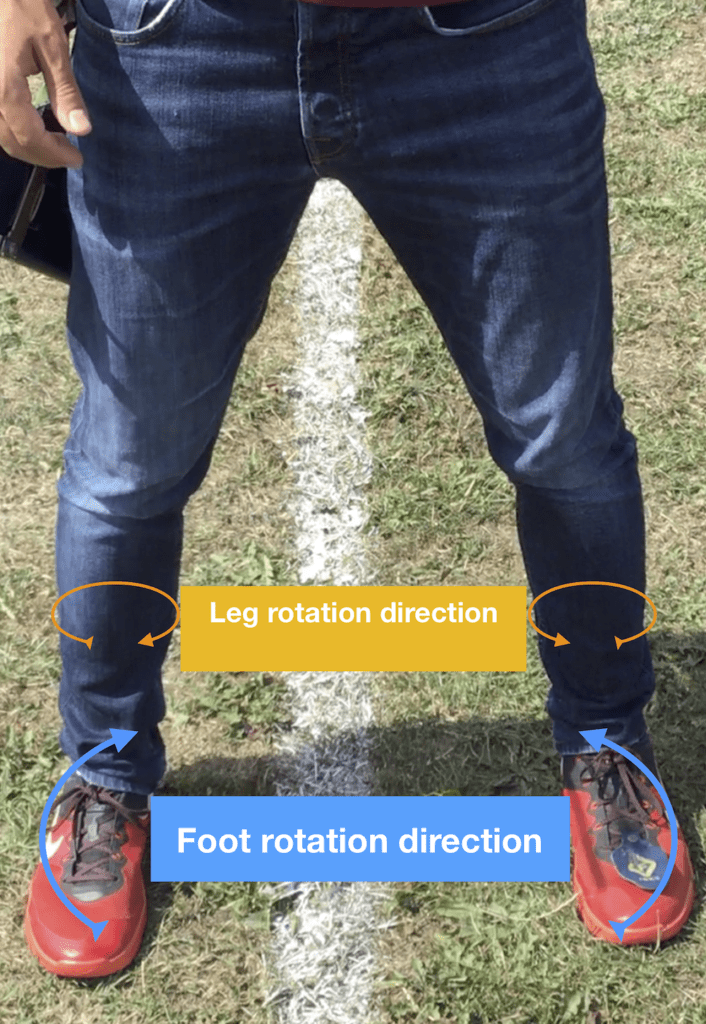
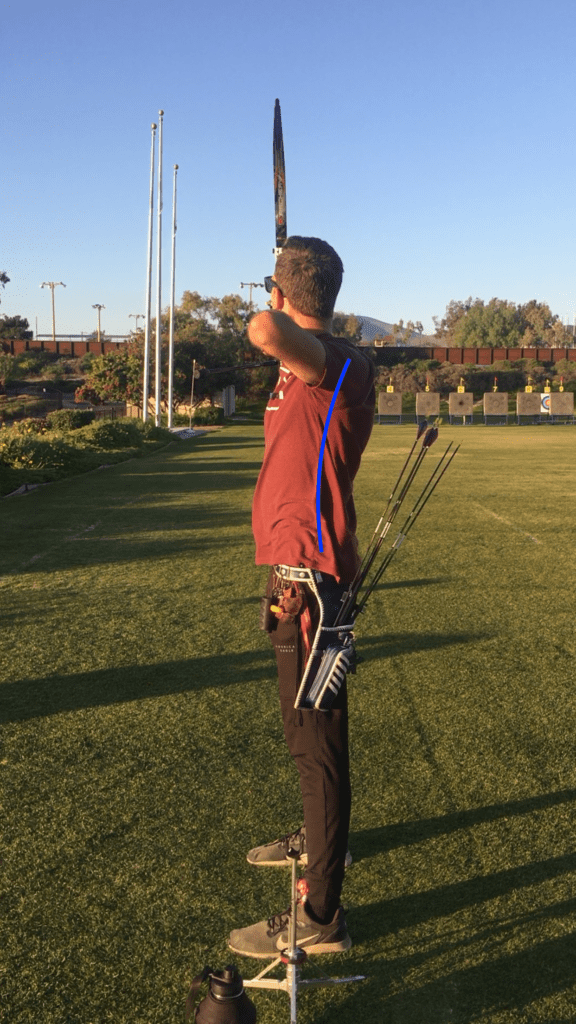
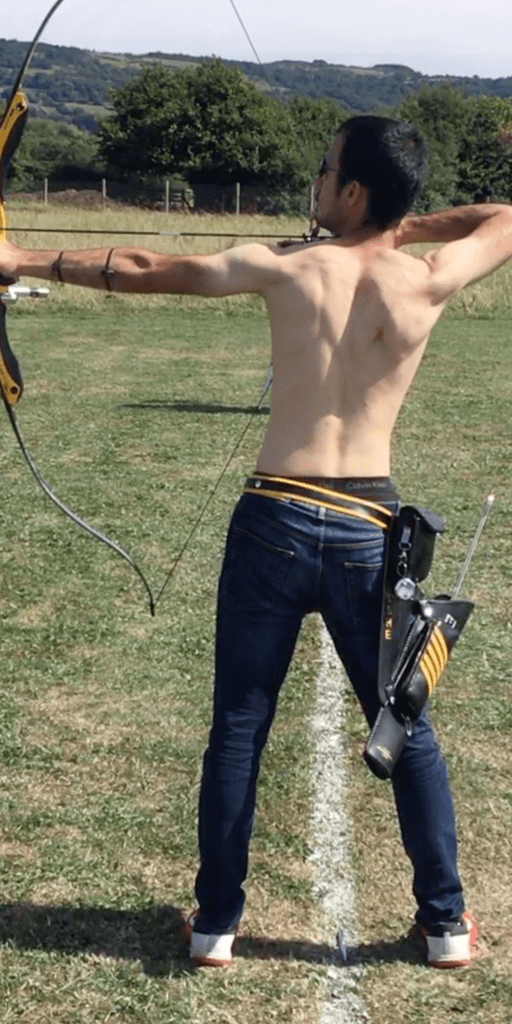
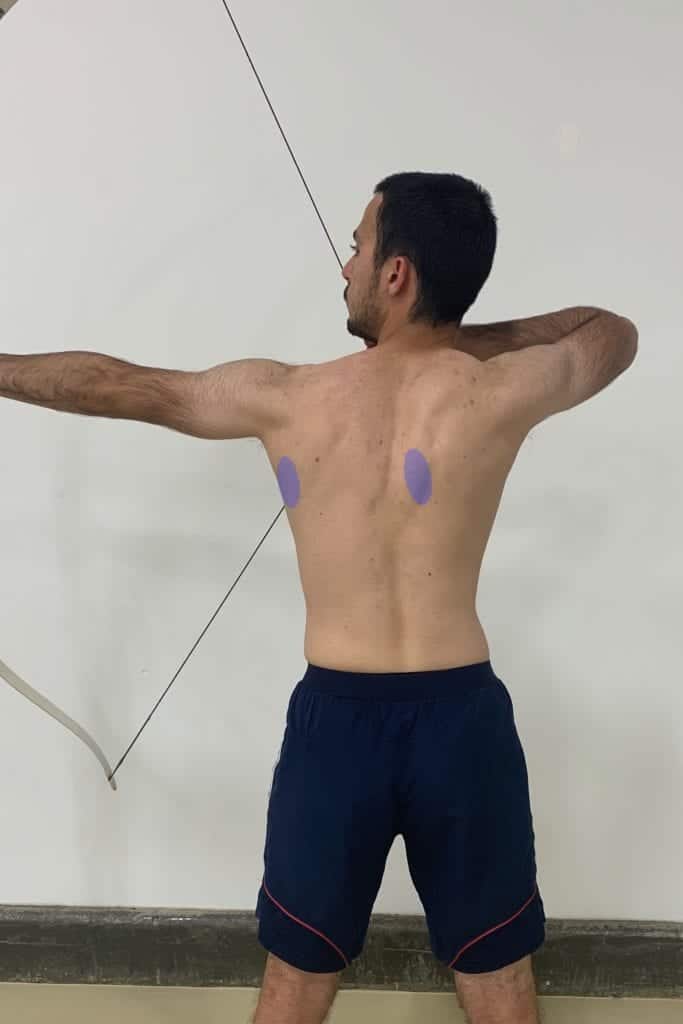
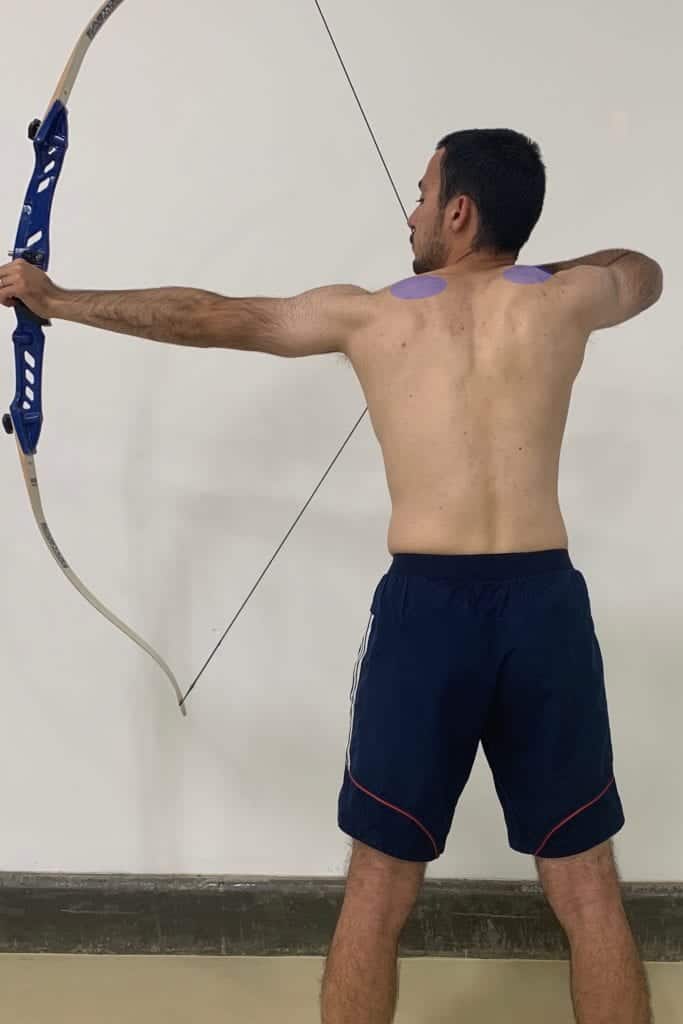
Place both feet either side of the shooting line, equidistant from each other and slightly wider than shoulder width apart. A line drawn through the balls of your feet should point at the gold. You can see this stance in Figure 1a and 1b.

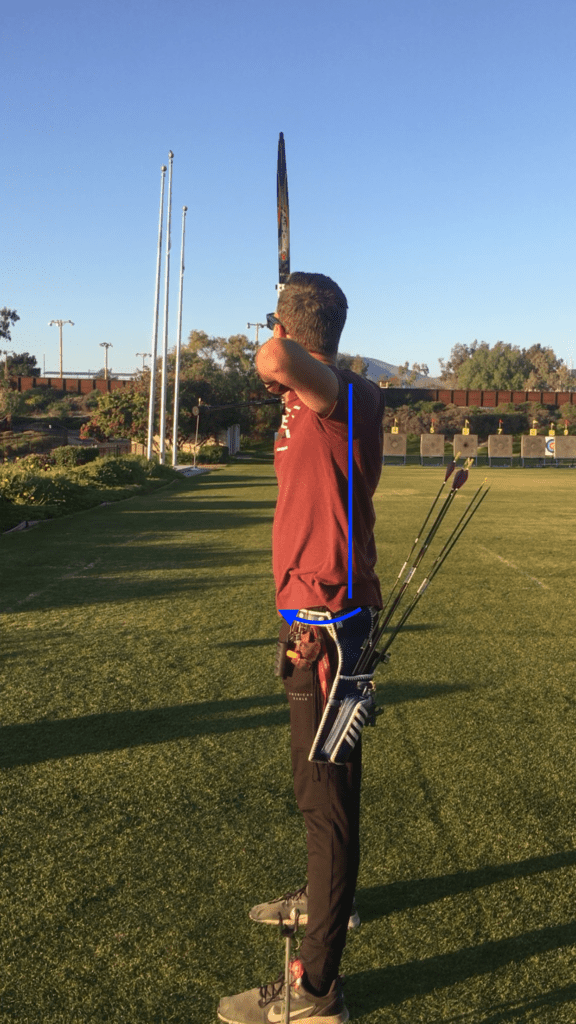
As you can see in Fig. 1b, the hips remain in line with the feet, and the shoulders remain in line with the hips.

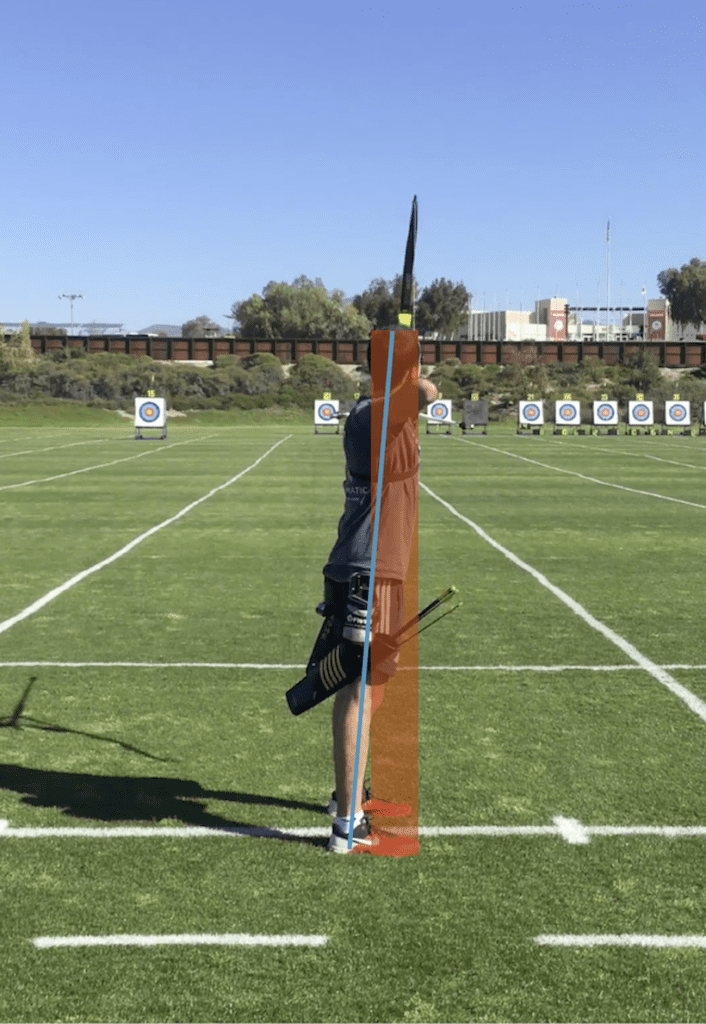
If your stance is too wide, you will feel too much tension in the legs. If it is too narrow, you will feel a lack of stability and the urge to lean away from the target. You should feel the weight of your body transferring through your pelvis, legs and right down to your feet.

recurve archer showing the foot position for a square stance
Fig 1a. Square stance from behind
recurve archer showing foot position when using a square stance
Fig 1b. Square stance showing hip alignment
a recurve archer showing correct square stance position
Fig 1c. Square stance from side

WHY THE SQUARE STANCE FOR RECURVE ARCHERY?

There are other recurve stance options which may eventually suit your individual archery technique better. These are the open and closed stances and they are great options for many archers, everyone is individual. However, we STRONGLY recommend shooting with the square stance to begin with until you have learnt the basics of proper recurve form and you’re more experienced, particularly with the technique for body posture.  Experiment with your stance after learning basic technique, and do this with an experienced recurve coach.

The reason we recommend the square stance is because it’s simple and efficient. You need minimal torso and abdomen rotation to achieve shoulder alignment. Therefore, it can be quicker to learn and maintain correct posture because it’s generally easier for you to feel leaning towards or away from the target. Because the shoulders are aligned with the hips and feet, they are naturally more closely aligned to the target. This means this stance can benefit shoulder alignment for some people, especially newcomers to recurve archery.

The square stance only places a low amount of stress on the body. This can be helpful if you lack back and torso flexibility, as a smaller amount of rotation is needed. Because you don’t need to twist the body so much, the back and spine are under less load.

The drawback of the square stance is stability in the wind. Because the feet are parallel, you have a narrow base of stability along the shooting line compared to an open stance.

LEGS AND GLUTES

The point of the stance is to enable good posture, and this starts from the legs. Your legs should be straight and your weight slightly forward, on to the balls of your feet.  This will help your posture and improve your archery form. It’s important to have no bend in the knee, but don’t pull your knee caps and retract them back. You can see good leg positioning in Fig. 2a, as well as the slight forward weight balance on to the balls of the feet.

Whilst not physically moving your feet, you should rotate your legs slightly so that it feels like you are pushing your heels together and your toes apart. You should then also be able to feel like you can grip the floor slightly with your toes. As you rotate your legs, you should feel your glutes (bum muscles) tighten and your bum cheeks squeeze together slightly. This process greatly increases the stability of your overall archery technique by solidifying your stance. You can see the correct direction of leg rotation in Fig. 2b.

archer showing recurve archery stance and posture weight balance on feet
Fig 2a.
archer showing foot position for square stance used in recurve archery
Fig 2b.

PELVIS POSITIONING

A hugely important part of proper technique is correct pelvis positioning. Many people stand and shoot with their bum sticking out and this compromises the rest of their posture. It arches the back, weakens your core engagement, and negatively impacts shoulder positioning and movement.

You must make sure to keep your pelvis and bum straight underneath the spine and not have your bum sticking out. It feels like a slight tilt of the pelvis forwards and underneath the spine. The previous rotation of the legs and engagement of the glutes does the majority of this movement, but you should be aware of what the pelvis is doing and how to maintain your positioning.

If you are in the correct position, your bum should not be sticking out, and your back will be flat. You should be able to clench your buttocks together, whereas this is much harder if your pelvis is in the wrong position and your bum is sticking out. The curved arrow in Fig. 3b shows you the direction of the pelvis tilt and the correct final position.

CORE ENGAGEMENT

Finally, you must make sure your core is engaged before lifting the bow. Doing this helps maintain your posture, stability and shoulder positioning. Again, the leg rotation and glute engagement greatly helps this part of the shot. From those stages, you should feel as if your centre of mass is low down and engaging the core should strengthen that.

To engage the core, slightly pull your stomach in and focus on making the area just below your belly button tense. The sensation is similar to preparing to be punched in the stomach. Maintain this core engagement through the whole shot. Physically, this stage can be hard, but it helps your technique massively.

In terms of overall technique, any recurve archer should learn to feel the difference between incorrect posture (Fig. 3a) and correct posture (Fig. 3b). Notice how the back is arched and the core isn’t engaged with the incorrect posture. Also, the weight is back onto the heels of the feet and the whole shot alignment looks compromised. Compare this to the correct posture and the difference is huge!

Your centre of mass will feel much lower when you have correct posture. You can see how much more ‘grounded’ the archer in Fig 3 looks when the posture is correct. This stability and power from the correct stance & posture will translate directly into the rest of your recurve archery.

bad recurve archery posture with arched back
Fig 3a.
good recurve archery posture with flat back
Fig 3b.

POSTURAL SWAY

Postural sway is movement of the whole body along the shooting line. You can normally see it when viewed from behind the archers elbow, and you can see the whole body swaying, almost as if the archer is being pushed by the wind. You can see this in the video below, ideally there would be no movement between the two lines.

All the previous work with the lower body should greatly improve your stability and minimize sway. Throughout your shot you want the body to remain as still as possible. So you should work on this along with the rest of your posture. The aim is to have no body movement from the moment you lift the bow until after the follow through.

This is one of the greatest similarities between ALL top recurve archers, they have minimal postural sway regardless of their technique.

ARCHERY POSTURE

UPPER BODY POSITIONING

This section should be simple if the rest of your posture is correct. The lower body position and the core engagement should promote a flat back which is essential for your shoulder positioning and movement. 

In particular, your spine should be as straight as possible throughout the shot. The lower body work should make the back flat when viewed from behind the shooting line. However, we also want the spine straight in the other plane, when looking at the archer’s back from along the shooting line. You can see this in Fig. 4a/b. Keeping your core engagement should greatly help this, but for beginners, some drills are normally helpful to demonstrate the correct position. You can see these stance drills on our Recurve Archery Drills page. Archery specific core and strength exercises will also have a massive impact on your ability to shoot with proper posture.

recurve archer showing good posture and spine position
Fig 4a.
recurve archer showing bad posture and spine position
Fig 4b.

CHEST AND SHOULDER POSITION

Your upper body should be straight, with your chest and shoulders in a neutral position (Fig. 5a). You should be able to feel engagement of the lower part of your shoulder blades. This is highlighted in blue in Fig 5a. This body position will make expansion much easier and more fluid. You will also have a cleaner, quicker release.

When you engage your core, your chest will be pulled down slightly as a result. This increases stability and prevents a high chest. However, you need to make sure to not ‘drop’ the chest excessively and allow the shoulders to become ’rounded’ as shown in Fig. 5b. Notice that when this happens the upper muscles of the shoulder are much more tense. You can see this highlighted in blue and you can notice the full draw position does not look as comfortable. This position is likely to make expansion very difficult, and it will be hard to keep consistent timing and a fluid release.

recurve archer with good upper body posture and shoulder position
Fig 5a. Good posture with neutral shoulders and chest.
recurve archery with bad upper body posture and high shoulder position
Fig 5b. Incorrect posture with rounded shoulders and chest dropped.

HEAD POSITIONING

Head positioning is simple, but does depend on the individual. This is because different face shapes will require the recurve archer to adjust their head position slightly for their own technique. You should experiment slightly to find your correct head position, preferably with a light bow or light limbs.

Important Points for Head Position

1. Start by looking straight ahead along the shooting line with your head level, then turn FULLY to the target. This is a good starting point for your head position.

2. Your head should be very slightly elevated, almost as if you are looking down your nose a tiny bit. You can see this best in Fig. 6a.

3. The head position should let your muscles around the neck and upper shoulders be relaxed.

4. Your head position shouldn’t move throughout the shot.

5. It should be possible to shoot with sunglasses if you’re head is turned far enough.

6. You should have your mouth shut through the whole shot.

7. For most people, it is good to have the head slightly angled in the direction you can see in Fig. 6c. The eyebrows are not perfectly horizontal. This helps with a relaxed head position and anchor point.

8. It is best to have the string touch close to the middle of your nose and slightly to the side of the chin as you can see in Fig. 6c.

Final Notes

Overall, the head should be in a neutral position, turned fully to the target. The neck and upper shoulders should be relaxed and your head shouldn’t move through the entire shot. It is good to have both eyes open and the mouth shut, with the entire face and jaw relaxed. You can see how the face looks relaxed and comfortable. The exact string position on the nose and chin may vary based on your anchor and face shape, but we recommend a slight side anchor with the string not exactly in the middle of the chin.

recurve archer showing good anchor point and head position
Fig 6a. Good head position 1
good recurve stance and posture
Fig 6b. Good head position 2
good recurve upper body posture and head position
Fig 6c. Good head position 3