After the recurve set phase we move to the setup phase. This stage of the shot is all about opening the bow correctly, and setting the majority of your shoulder alignment. The aim here is to do this in the most efficient, repeatable way. If you do this stage properly, it will be much easier to draw the bow and achieve a consistent expansion and release.
During this stage of the shot it is crucial to maintain the previous work we have done during the Stance & Posture and Set stages. As well as maintaining your core and posture, you must maintain your grip, hook and the connection between your hook, draw elbow and draw shoulder.
It is important to reinforce what we have said previously about the stages of the shot. We have split the shot into 6 steps, and there are parts of the recurve shot (such as Set and Set-Up) where motion should slow down. However, there is never any stopping or pausing during the recurve shot. You can read more about this on the Recurve Shot Cycle and Recurve Archery Basics pages.
1. Maintain the draw side connection you created during the set phase. Keep the hook, grip and wrist angle.
2. Keep your core, posture and head position.
3. Lead the opening movement from the draw elbow. Keep the string picture far to the right of the bow.
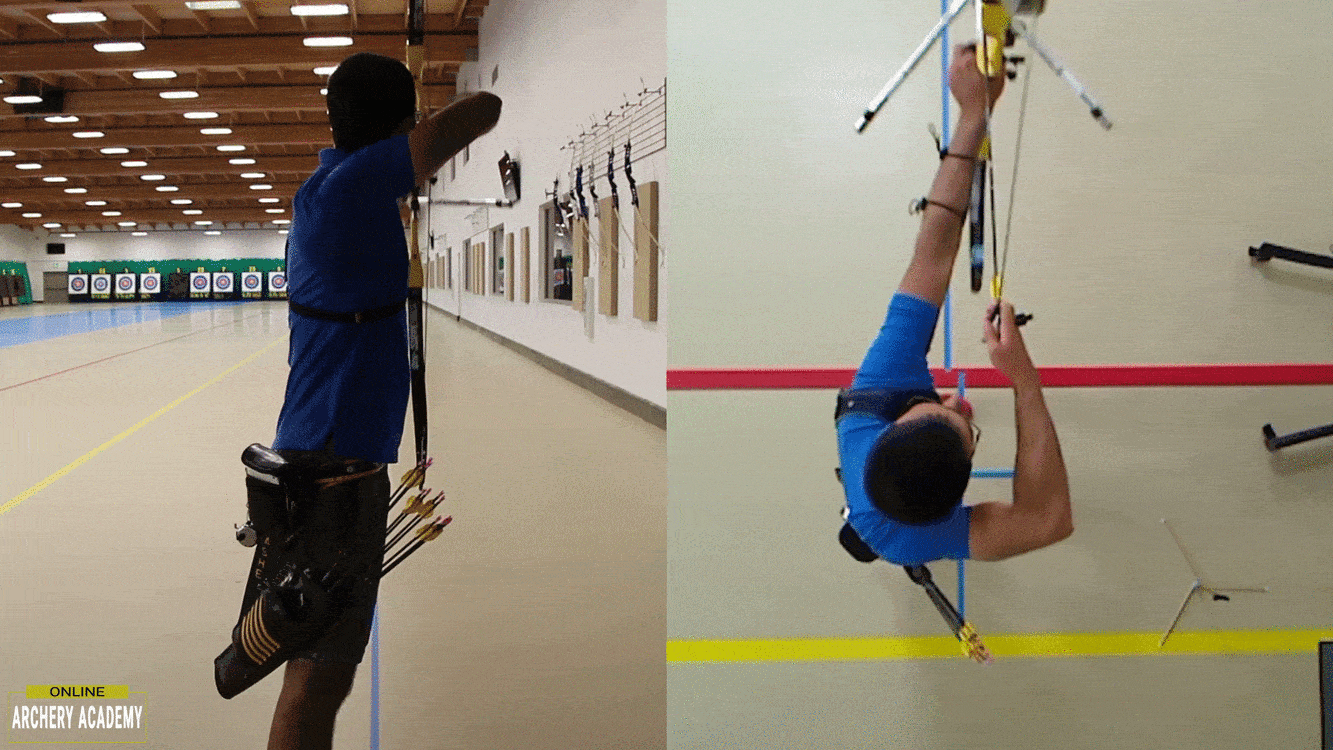
4. Keep your shoulders slightly open to the target when raising the bow, don’t try and align the bow shoulder early.
5. You should raise the bow above the target line, the exact height is personal but should be within World Archery rules.
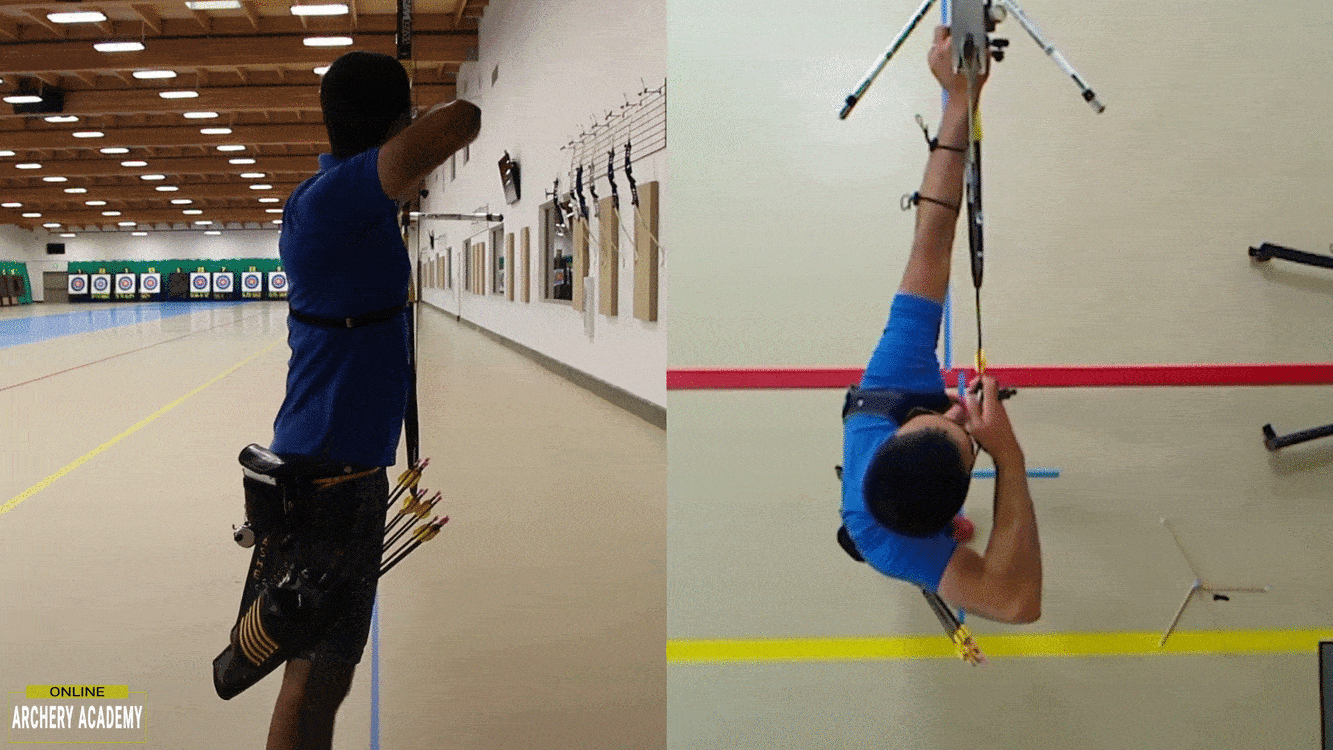
6. Do most of the opening of the bow and the alignment of the shoulders at the peak bow raise height.
7. The lowering of the bow should be slower than the raising.
8. By setup, you should have completed most of your shoulder alignment. Your bow arm elbow joint should be rotated.
As we mentioned, you must maintain your core and posture through the setup phase. There are two key points where many people lose connection with their core: when they begin raising the bow and when they perform the main movement to get shoulder alignment. You should take extra care at these points.
In the Set phase, you created the connection between your grip, hook, and draw elbow. You must keep this connection when you open the bow. Maintaining your draw hand wrist angle and leading your movement from the draw elbow is key to achieve this. As we showed before, you can see this in Video 1 again. The bottom example in the video shows a much better connection between the hook, draw elbow and back compared to the top example.
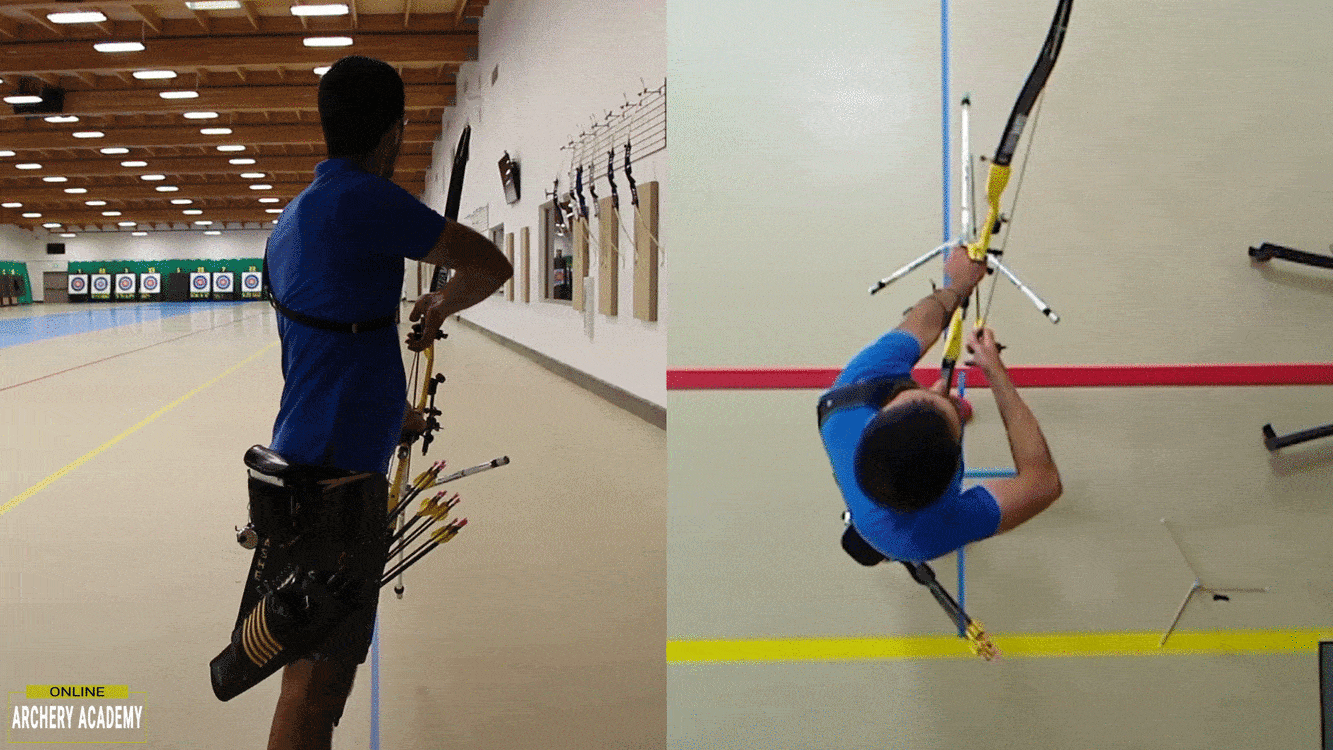
When you open the bow, the string should be to the right of the riser throughout the whole set and setup phase. This is when viewed from the archers point of view. You can see this in Fig 1, where the string is to the right from Fig 1a through to Fig 1c.
Although the string is left of the riser in the left hand side of Fig 1a, from the archers viewpoint it will appear to the right of the riser. You can also see in Video 1 that the bottom example has the string to the right of the riser from the archers point of view. Compare this to the upper example and you can see the string is to the left of the riser.
Having the string to the right of the riser will help you to lead your movement from the draw elbow. Also, it helps keep the longrod pointing slightly left of the target until later in the shot. You can also see the opening of the bow and the whole shot in Video 2 below.
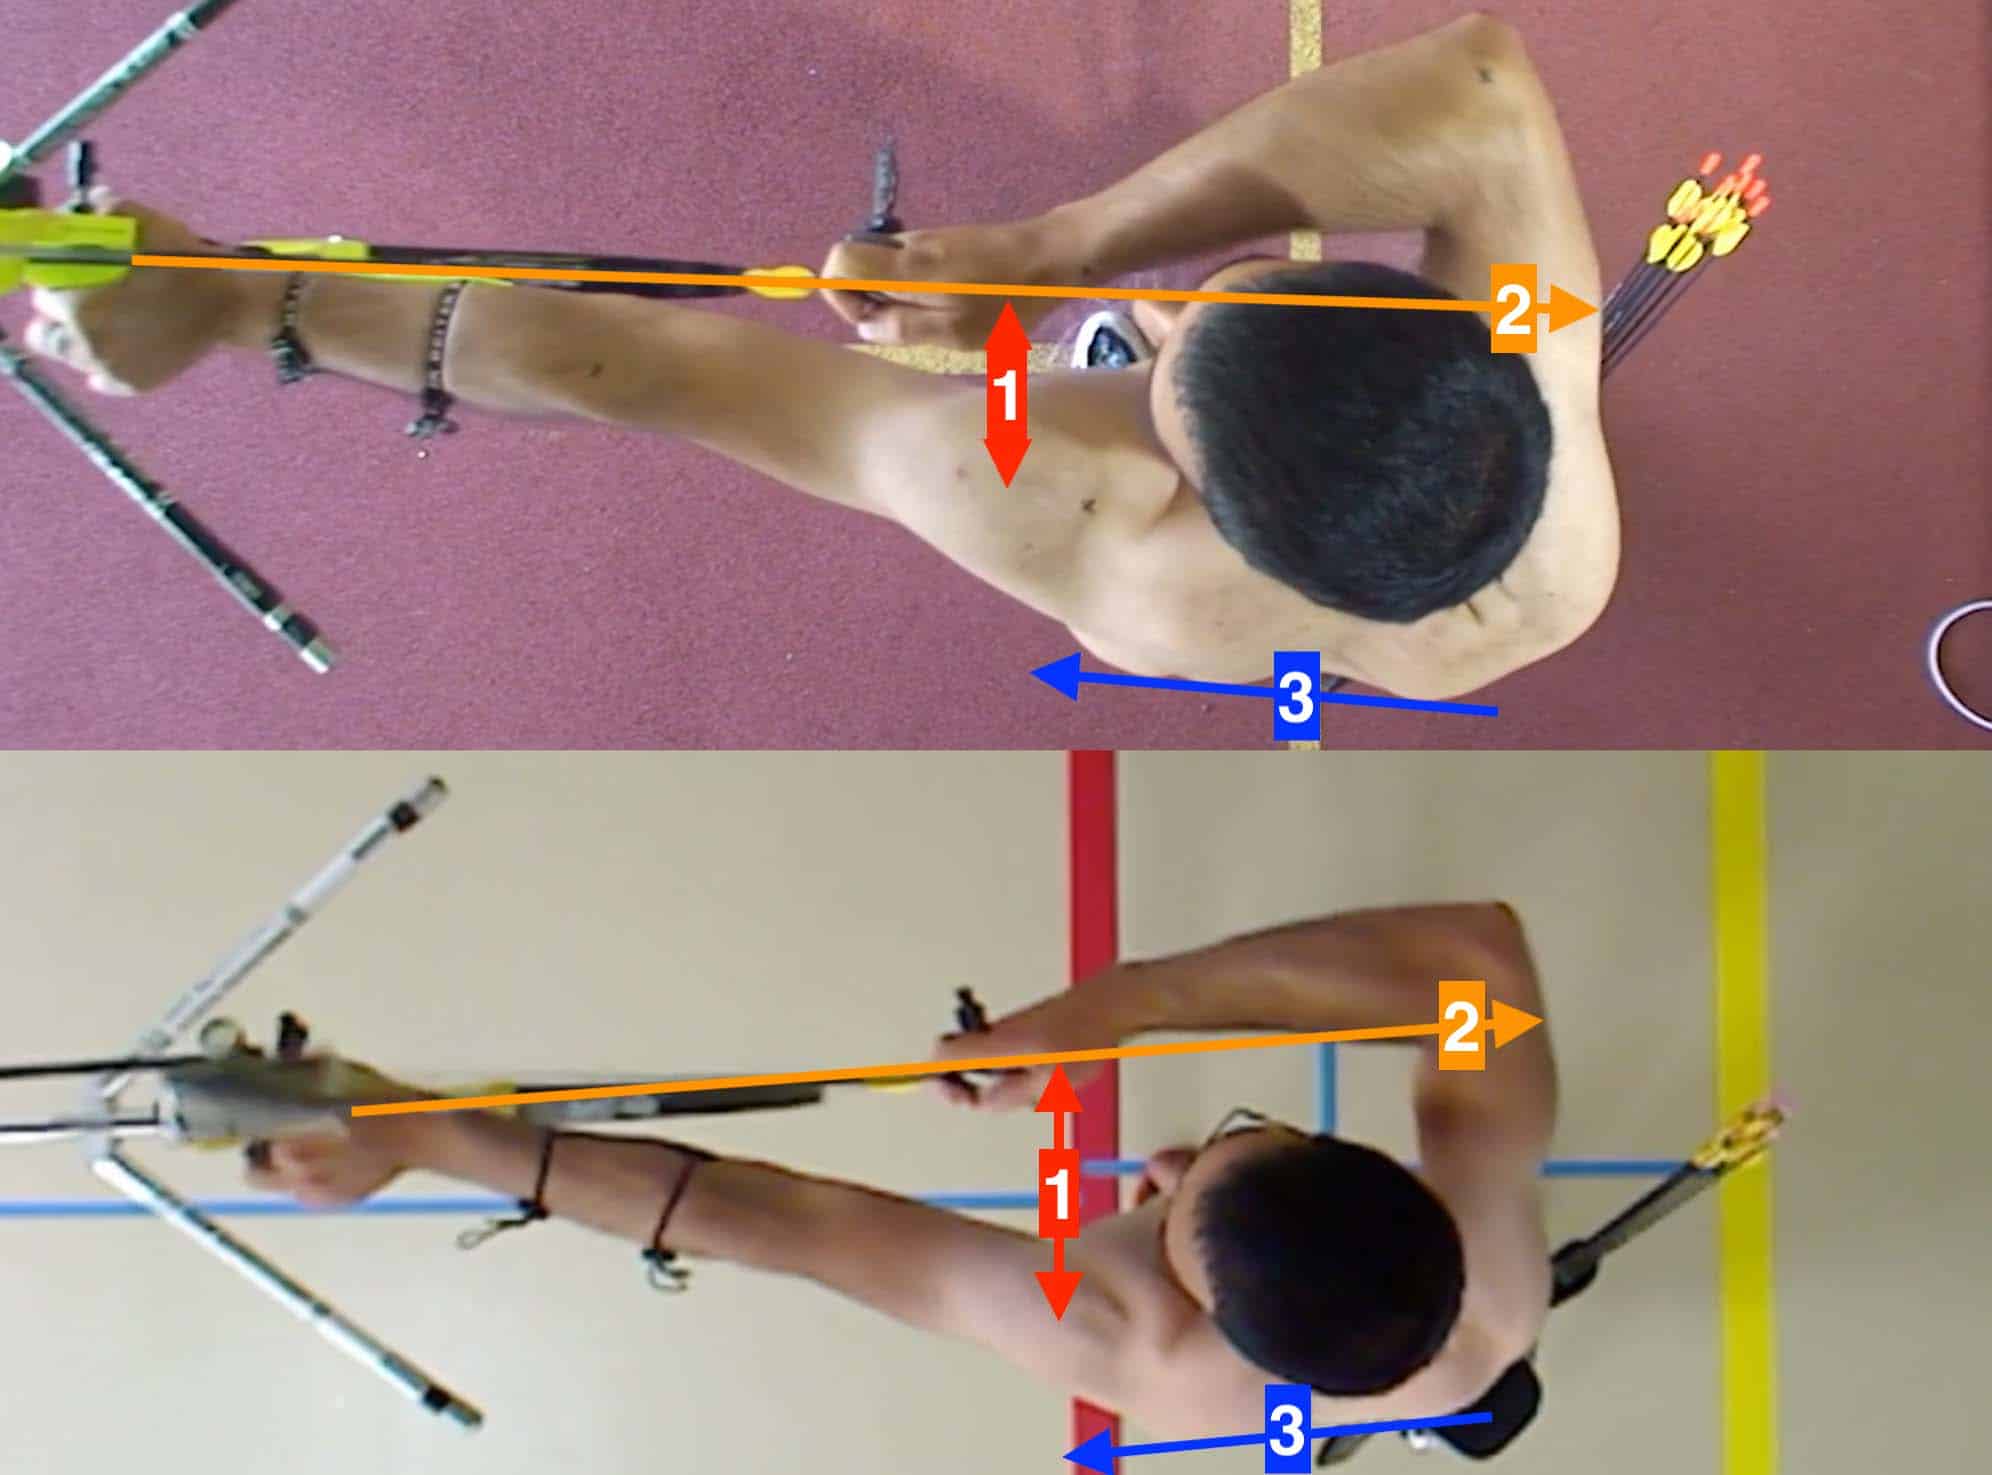
It is important to keep the draw shoulder in a neutral position throughout the shot. You must keep the draw shoulder from being high or overly forwards in the socket. This is often caused by having a pre draw which is too short or by placing the draw hand too close to the bow shoulder (Upper example in Video 1 and Fig 2). The draw shoulder blade should be flat against the body and it should feel as if there is space around the shoulder joint, not compression or tightness. Any clicking, clunking or cracking needs to be identified and eliminated.
You can see the huge difference in the two methods of opening the bow in Fig 2 below. In the long term, the compressed shoulder joint in the upper example is likely to lead to shoulder injury. In the bottom example, notice how the draw hand is further from the bow shoulder (1). Also, the line of force from the string is closer to the draw elbow rather than the upper arm (2). Lastly, notice how the bow shoulder is in LESS alignment here (3); trying to align the bow shoulder too early is a common mistake and compromises the draw side connection.
When you open and raise the bow, it should feel as if the majority of your movement is being created by the draw elbow moving out and around your body. Previously, you created the connection between your hook and your draw elbow. During the setup, you must use that connection to raise and open the bow.
Most archers have heard about 50:50 balance, so why should opening the bow feel mostly caused by the draw elbow moving aggressively round? There’s a simple reason for this: most people naturally align and open the bow arm side enough because they can see it. Through your peripheral vision and gaze at the target, you can see exactly what you’re doing on your bow arm side. However, you obviously can not see the movement you are doing on your draw arm side. As a result, most people don’t perform the correct draw side movement or focus too much on the bow side during the shot.
To remedy this, you should feel as if the bulk of your opening movement comes from the draw elbow. You should also make sure you are not aligning your bow shoulder too early as we previously mentioned.
Kim Woo Jin is one of the worlds best archers. You can see below in Video 3 how he opens the bow using the principles we have talked about.
The first movement to open the bow should be a continuation of the direction you created in the Set (Fig 12b) position. You should use just enough string tension to maintain your grip, hook and draw elbow connection. Then simply raise the bow and keep this connection. It should feel like you are using your draw elbow to move the string out and around your body, not pull the string straight to the face. This is perhaps the most common mistake for recurve archers during the setup.
You can see in the right hand side of Fig. 3 that you are not actually opening the bow very much yet; watch the draw elbow and you can see the drawing movement is fairly small. The key part of the whole recurve setup is the connection between the draw hand and the draw elbow. This should remain solidly connected at all times. It is crucial to maintain your hook and wrist position correctly here, without change.
This raising part is simply about lifting the bow and maintaining the parts of your shot you worked hard for already, especially the draw side connection. You should allow your shoulders and upper torso to remain slightly open to the target when you raise the bow as demonstrated in Fig 3. Keeping the shoulders slightly open here will allow you to use your whole body to perform most of your alignment near the peak of the bow lift.
The bow shoulder will naturally come slightly more into alignment as you move around with the draw elbow. You can see this clearly in the right hand side of Fig. 3.